Friday, September 28, 2007

A Tellerbarret Pattern

I found something on Saint Maximilians Landsknecht Reenactment Guild that started my research on the tellerbarret (or pizza hat) that the landsknechts wore in some of the woodcuts.

According to their site...

Hat

* Because we are often marching in the sun a hat called a tellerbarret (platter hat) is the best choice. It is sometime s referred to as a 'pizza hat'. It is a large fairly flat circle. The hat should be made from wool and selected from a woodcut. Be very careful about the size of the hat - don't make it too big, as it will get in the way of your pike. Somewhere between 16" and 24"(?). It can be a simple circle but it is recommended to do the style that is done by overlapping two somewhat more than half circles. There are many other details that are allowed- there are many woodcuts to chose from. The crown is usually a flat circle. You may have a smaller hat if you are absolutely immune to the sun but it is not recommended as your only hat.
* Feathers are optional; you may have from 1 to possibly 10 (if small) ostrich feathers, large or 'down'. The amount and color of feathers should be checked with the costume coordinator. Period feathers can be difficult to find since modern colored feathers tend to by dyed too brightly. Natural, white, or primary colors are encouraged. Pastel or neon colors will not be allowed. No other types of feathers allowed.

Found a couple of woodcuts of the type of hat my husband prefers along with a floppy version that I found interesting.


I found written instructions for making one of the more rigid tellerbarrets on http://www.fahnlein.com/forums/forums/thread-view.asp?tid=206&posts=9&start=1 which I've included here.

Hat Instructions:

This description assumes that you have actually had your hands on one of these hats at some time and will generally understand the anatomy that I am talking about. If this isn't the case, I don't have the digital camera to assist you...

Materials Needed:
1.5 - 2 yards of mid weight fabric (brim and "box")
.75 yards of HEAVY weight buckram - the width I found with an acceptable weight at Hancock Fabrics was only about 20" - you'll only need a little more than 18".
One 18" Brass Macrame Hoop (the secret ingredient)
One package double fold bias tape.
One 40" cotton braid shoe string - in whatever color you want your strap to be.

Okay, start by placing your macrame hoop on your buckram. Trace a circle (using the outter edge of the hoop as a guide) and cut it out. Mark the center of your circle. Now: you will need to cut an rounded oval hole, centered on the center of the circle, for your head to go in. This is trial and error. once you have a hole that fits well, cut another .25" off (for seams and bias tape to make up later)

Using heavy thread, baste the ring to the circle around the edges. You should now have a "halo" with the ring at the edge to re-enforce the buckram. Once the ring is in place (and generally not moving around) use the double fold bias tape to seal it to the edge of the buckram - hand sewing time. Just open up the bias tape and place it so that it encases the brass ring and helps attach it that much better to the buckram when you sew it down.

Next, measure the widest point between the ring and the cut out for your head, this should be the broadest section of the buckram. Double this measurement and add at least two inches. This will be the width of your brim fabric. You will be cutting a long rectangle with the length being the circumfrence of your brim and the width being the measurement you just calculated. (Actually, I ususally subract at least one inch from the "lenght" of this rectangle so that the fabric fits the brim tightly).

Sew the width-ends of your rectangle together, now you have a big circle of fabric, like a ring, which should be something like 53" around (if you are using an 18" macrame hoop) and about 13" - 16" inches wide.

Place your rimmed "halo" inside the circle of fabric. Once it is centered on the circle, you should be able to see that the "brim" fabric will drape into place on the "halo", making up the top and bottom fabric covering on the brim of your "pizza" hat. This fabric needs to be either gathered or pleated into place and tacked down at the "inner" edge of the brim (the hole where your head will go). *This style will not have very deep pleats - see end of message for the variation.

Now, the "box" that goes on top of the hat can be made in a number of ways. No matter where you place the seams of the four parts on the "top" of the box, you will need to make a matching "bottom". Once this "bottom" has been constructed, center it on your brim piece and cut out a hole that matches the head hole in your brim. (You can line your "box" by replicating it exactly inside out - including head hole). Sew the square, outside edges of your "top" and "bottom" box pieces together (place liner inside at this point if you are lining it).

Line up the edges of the head hole on your brim with the edges of the head hole on your "box". Baste the two together. ALMOST DONE!

Now, make a peice of bias tape out of your remaining fabric. You dont need a lot of fabric to do this and you can find better descriptions of making bias tape online than I can give you here. Use this bais tape to cover all the nasty, thready ends that are now all around your joint head hole. This is going to be hand sewing.

Finish your hat with the cotton shoe string (minus plasticy end bits - use white glue and roll the cut ends between your fingers until they dry to reseal the ends of the cut cotton shoe string in a more "period" way) as the chin strap - lots of different methods here as well. You can include a covered button in the middle top of your box.

At one point I found visual instructions for making a tellerbarret and doing a little digging, I found the Flickr site again. http://www.flickr.com/photos/77086627@N00/page2/ He also has patterns for making other bits and pieces to the landsknecht outfit, but I'll post them later when I have more time.


Hopefully between the written and visual instructions, making one should be a snap. :D

Thursday, September 27, 2007

Duck Shoes

Or so I've heard them called... Here are the shoes that I believe my husband said he wanted for his garb.


Landsknecht Project List

According to Renaissance Costuming FAQ, landsknecht basic garb consists of the following: (New project list!)

1) Shirt: In one aspect German shirts are very unique - they did not use the yoked style so prevalent in many other countries at the time. Also the ever-popular "drawstring" faire shirts are less then period. One variation I’ve seen on the German shirt came up only to the base of the neck, and the fullness of the shirt was pleated and/or gathered onto a collar. Other variations include the smock-type shirt with full sleeves, and the normal collared Elizabethan shirt with box-pleated ruff.

2) Doublet: German doublets vary as much in design as any other countries would. Most often, however, they favored a side or back closure over front closures. Some overdoublets might cross in front as a bathrobe would. The doublet often had elaborate slashing. Another front closure doublet seems an adaptation of the placket-front bodice. You get into the doublet much as you would a shirt and the placket (which is much like the top of overalls) is buttoned and/or laced into place.

3) Trews: The trews German men wore never reached much further down the leg than immediately below the knee. Styles varied from form-fitting pant to the wide leg "pumpkin" pants. Slashing was prevalent on this garment, and rarely did the pattern of slashing on one leg match that of the other leg.

[Personal addendum to correct indexing: I'm finding that these are more commonly referred to as 'pluderhosen'. http://www.dict.cc/german-english/Pluderhosen.html Therefore, that's my link in the index, not Trews.]

4) Waffenroch (pronounced (approx.) vawf - fen - rawk): Literally "war-coat" - the skirted doublet that some German’s wear, you may remember it more aptly as the long, skirted doublet Henry VIII adopted. The origins of the name may be only a "faire-ism" but it is appropriate as it was worn over the already single or double layer of doublets and trews as an additional protection against enemy weapons. Typically this doublet has a side closure. Some also have placket closures in the front (perhaps just for show).

5) Stockings/Hosen: All men would wear stockings of some sort. Length varied from knee-high to full leg-length hose. Striped hosen and/or parti-color hosen were common, as was wearing two different colors of hose.

6) Hats: There are two hats a German man would wear: something close to a woman’s headwrap and then the over-hat.

7) Head-wrap or Under-cap.

Caul - this is a smaller version of the popular muffin cap. The band that sits on the head is thinner and the bag for the hat is cut much closer to the head. In most cases men will wear this on top of the head and under the larger over-hat.

Arming Cap - this cap may be worn alone or under another hat. Typically the arming cap is made out of leather or wool - it looks an awful lot like a padded version of the biggins cap. Some might want to put some slashing on this cap. This cap was adopted to protect the head from the helmet. You can find a good pattern for an arming cap here.

8) Over-hat [or tellerbarret]

The typical hat most men wore is what we affectionately call the "pizza" hat. This hat has a large brim, in some cases measuring over three feet in the circumference. There are many variations on this style of hat including: parti-colored hats, "barber-pole" trimmed hats, pleated, starfish brimmed, etc...

9) Shoes: Shoes would be sturdy and well-suited for marching. Black or brown leather with dark soles. Some shoes might boast puff and slash patterns.

Poor People's Poulaines

I found a site for how to make mock poulaines or as they like to say on the site, poor ppl's poulaines.

Poor People's Poulaines

I figure if I can make a pair of these and a set of pattens for them, I should be good to go for a bit. Like with the embroidery box and cushion, I figured I'd post what was on their site again, so I don't lose it.


Poor People's Poulaines

Easy pointy shoes out of modern leather, which will look accurate at normal distances.
by Cynthia Virtue aka Cynthia du Pré Argent


Hand sewn turnshoes from a medieval recreationist merchant start at around $100 for good ones. Learning how to do them is great -- if you can find a teacher. This handout is for everyone else.

This handout is in support of the class, and covers shoes with points at the toe; mostly from the 15th century, but there is one picture of shoes from a tomb effigy of about 1314 which shows the basic early shoe with very mild points and metal mounts (decorations). The Museum of London's Shoes and Pattens book has an excellent chart showing found shoe shapes by region and time period, which I highly recommend to anyone interested in this topic.

The main sources for this informal reconstruction are below. Other points were added after conversations with Master Geoffrey Matthias, and I. Marc Carlson who have done a lot of research into this area. Anyone looking for more details on shoes would do well to consult with these gentlemen, or others, who have made more of a study of the subject than I have.

My goal is to get as many people into pointy shoes as possible; they're not as difficult to walk in as it looks, and they are useful if you are wearing the very long houppelande skirts! I hope that if folks make these, they will be interested in making the real version, out of heavy leather and sewn by hand in the accurate method. This method is designed for either fairly thin leather (thin enough to be sewn by a sewing machine) or, if you want to try on something less expensive first, out of marine vinyl. Sturdy leather poulaines are available from various sources, but the prices tend to be rather high unless you're making a chunk of money. Hence, these are "poor people's poulaines."

But first: Some pictures! [I removed the section on pictures at this time.]

Note: Figure 12 of the page of many shoes from The Pictorial History of Costume is erroneous (toes held up by tying to the ankle with gilded chains.) It seems as if the evidence for toe-chains all originates later than the time that they "might" have been in use. Some say that an error in translation of a manuscript about 100 years ago introduced this imaginative bit of footwear. There are some descriptions from the 1500s that mention the toe-chains, but since they are not contemporary, they are suspect.
Marc Carlson (whose web pages on shoes I highly recommend to anyone) found the following citation, which supports his opinion that tying the points of the shoes to the knee was an incorrect assumption from later in history; in this case someone writing around 1550 or later, about a style prevalent 85-150 years earlier. The second paragraph cited is from this source:
Stow, John 1525?-1605 The survey of London containing the original, increase, modern estate and government of that city, methodically set down : with a memorial of those famouser acts of charity, which for publick and pious vses have been bestowed by many worshipfull citizens and benefactors : as also all the ancient and modern monuments erected in the churches, not only of those two famous cities, London and Westminster, but (now newly added) four miles compass (1598) - p.131.
The citation reads:
"In Distar Lane, on the North side thereof, is the Cordwainers or Shoemaker's Hall, which company were made a brotherhood or fraternity in the 11th of Henry IV. Of these Cordwayners I read, that since the fifth of Richard II. (when he took to wife Anne, daughter to Veselaus, King of Boheme), by her example the English people had used piked shoes, tied to their knees with silken laces, or chains of silver or gilt, wherefore in the fourth of Edward IV. it was ordained and proclaimed, that beaks of shoone and boots, should not pass the length of two inches, upon pain of cursing by the clergy, and by Parliament to pay 20 shillings for every pair. And every cordwainer that shod any man or woman on the Sunday, to pay 30 shillings."
Certainly out of the hundreds of pictures I have seen that were created in the middle ages, not one includes chains running from the long toe of the shoe to either the knee or the ankle. (Just imagine how easy it would be to trip and fall!) If you come across one, I'd love to see it.


* So how long were these points, anyway? One fairly un-reliable source I have says that anyone who was lower than a prince could not wear points on their shoes that measured over six inches in length. If you look at the pictures in this handout you can see that the points during the 15th century seem to be between `half the foot long' and `as long as the foot' in most cases. You can do your own figuring for your own foot how long this really would be for you.

Materials needed:

One thin sock, to destroy
Masking tape
Scrap paper
Either thin leather OR matte, "marine quality" vinyl. Should be moderately thick, with a knitted back, for support. Do not buy the vinyl with fuzz on the back. Do your first pair in vinyl to make sure it works for you.
Sewing machine, etc. Leather needles for the sewing machine are useful, but not fully necessary.

Steps: (pun intended)
It should be noted that I've had some trouble making this process work quite the way I want it to. If you have trouble, it's probably not your fault.

1) Put on your sock.

2) Using paper, make a cone to go over the end of your toes, to be the right shape for the long pointy toe. Should be 4" or shorter for your first attempt, and fairly narrow.

3) Tape cone to sock/foot. Cover rest of foot lightly with masking tape, molding it to your foot shape.

4) Draw seam lines on the masking tape (see pictures of medieval shoes to give you placement tips). I recommend: a low one around the ankle, a vertical seam just under the ankle bone on each side, and the line for the sole. Make sure sole line at point is flat with an arch above it.

5) Carefully cut the masking tape and sock pieces off your foot. Flatten pieces so that they can be your pattern-pieces. Make "darts" where necessary in the pieces, so that they will lie flat.

6) Trace these pattern pieces onto scrap fabric. Add 1/4 inch seam allowance; sew together.

7) Check fit on your foot and adjust as necessary (you may have to re-cut another test version if you make a lot of changes.

8) Use either the altered fabric pieces or the original masking tape ones to trace onto pieces of heavy vinyl for the shoes. Remember to include seam allowance if using the masking-tape ones! Turn pieces over to make the other foot.

9) Sew vinyl together, using a leather needle if possible (leather needles have sharp edges, as well as the standard sharp point.) Edge top edge of shoe or turn narrow edge over and stitch, for strength. Add ties or buttons and loops if you wish (not always necessary)

10) Note that you are going to have to fudge the seam at the edge of the sole a bit, due to geometry. Proceed patiently and it should all come out ok.


Wednesday, September 26, 2007

Bag

K.C. indicated that pewter casting would work really well for the purse frame, so I found a Florilegium article on pewter casting with soapstone. Whether I can actually master this skill or not is something to be determined. I don't know that I can carve much of anything to make it resemble what I need, but I can always try.

Florilegium - Pewter Casting

Pewter Casting - Has illustrations and other research.
Pewter Casting - This site has a nice equipment list as well as two projects he worked through and a link to an online supplier for pewter.

Soapstone Bricks from Vermont - I think this is a fairly reasonable price, but it's not easy to find a lot of soapstone online, at least thus far.

Embroidered Cushion

From the same site as the Embroidered Box I also found an Embroidered Cushion. Isn't that marvelous?

A 14th - 15th century Embroidered Cushion from Westphalia (Germany)

The pictures and descriptions are small enough, I figured I might as well copy and paste so as not to loose them to the vagarities of the internet web page spider monkeys.


This cushion is described in A Pictorial History of Western Embroidery, by Marie Schuette and Sigrid Mueller-Christiansen (1963) Frederick A. Praeger, New York, Item Number 178. The caption states:

"CUSHION. Westphalia, 14th to 15th century. Berlin, Schloss Charlottenburg, Kunstgewerbemuseum (88.663). 28 x 40 cm. Grey linen canvas. Embroidered with untwisted floss silk in brick stitch. Colors: green, yellow, red, white. On the underside, striped Spanish silk. From the Treasury of Enger. Acquired from the Dionysianisches Kapitel der Johanneskirche in Herford."


The Kunstgewerbemuseum is no longer located in the Charlottenburg Palace, but is now in the Kulturforum in Berlin. The colors listed are incorrect. They should be green (DMC 989), blue (DMC 312), red (DMC 3777), and white (DMC Ecru or Brut). In Kreinik Au Ver a Soie colors, these are equivalent to green 233, blue 1446 or 1424, red 946 and Brut or Creme.
The front of the cushion is completely covered with brick stitch, and is still very bright and colorful. There is almost no lost stitching. The "striped Spanish silk" back is a surprisingly modern-looking pattern of wide (~1/2") golden-yellow stripes separated by narrow black and white stripes. It is very thin, and is falling apart, and I'm still kicking myself for neglecting to take a photograph of it. The cushion itself is plump and well-stuffed, and not at all flattened. I was told that the stuffing was original, and it appears to be fine hay, or something similar.

The embroidery ground is a grey tabby-woven linen, and each brick stitch covers four threads. After charting the overall pattern, I found that the entire pillow is 395 threads across, and 326 threads tall. Divided into the actual breadth and height of the pillow, I get a ground fabric of 25 tpi (threads per inch) across, and 29-30 tpi tall.
Although the overall pattern is composed of only 4 different types of medallions, almost all of the medallions of a given type were different from each other. Some of the differences are merely "off register" variants, caused by starting a design element off one thread, so that a bird runs into a plant, or a medallion ends up losing a row of stitches. Some variants are caused by running out of one color thread, and replacing it with a different color. Interestingly, it is always white that is being replaced by either red or green.
I made my own recreation of this cushion, based on the[ following ]se charts. I used linen with a thread count of about 26 x 28, and it ended up being 39.37 x 29.85 cm. It took about 86 hours of stitching time, spaced over 2 years and 8 months. It isn't actually finished, strictly speaking, because I haven't found appropriate material for the back side, nor a good stuffing.


T = Tree Medallion, and 10 variants,

B = Bird Medallion, and 1 variant,

S = Striped Medallion,

F = Flake Medallion, and 7 variants.

View or download all charts.

Embroidered Box


I found an interesting box on a website today that I think I'll attempt at some point to replicate. I can likely use it to store little objects of personal value. Not necessarily jewelry or things of that nature, but perhaps sewing supplies I don't want to get lost, writing implimentation, paper... The possibilities are endless, it just takes doing it, unless I find that these types of boxes were used for a specific purpose, which will likely happen, but for now, it's a neat little box and I like it's construction.

A 14th - 15th century Embroidered Box from Westphalia (Germany)

As with the embroidered cushion, I determined to go ahead and place the information from her site here so I won't lose it.

This box is described in A Pictorial History of Western Embroidery, by Marie Schuette and Sigrid Mueller-Christiansen (1963) Frederick A. Praeger, New York, Item Number 178. The caption states:

"CORPORAL BOX WITH EMBROIDERED COVER. Westphalia, 14th to 15th century. Berlin, Schloss Charlottenburg, Kunstgewerbemuseum (88.651). Height: 4.6 cm. Width: 22.4 cm. Length: 22.4 cm. Wood, originally with four (now only three) ornamental metal feet of spherical shape. Covered inside and outside with linen. The six outer sides embroidered with floss silk in green, red, blue, white, pink. The underside and side walls have similar patterns in long-armed cross stitch. The cover, illustrated, is in brick stitch. From the Treasury of Enger. Acquired from the Dionysianisches Kapitel der Johanneskirche in Herford."

Design and ConstructionThe design on the top of the box consists of staggered rows of diamonds, and the bottom and sides are of a "spiral in star" motif (see photos). The colors are quite faded, and there seem to have been only four: blue (DMC 597 or Au Ver a Soie 132), a green that had faded off to a yellowish color (DMC 734 or Au Ver a Soie 2212), a very faded bown-pink (DMC 842 or Au Ver a Soie 4532), and off white (DMC Ecru, or Au Ver a Soie Brut or Creme). I suspect that the box's original colors were very similar to those found on an embroidered cushion which also came from the Treasury of Enger. The green was probably much "grassier" originally, and the pink was probably a brilliant rosewood red.

The top of the box is worked entirely in brick stitch, with each stitch covering two threads. The design is made up of four kinds of diamond patterns, and their placement is diagrammed below. The "D2" type is a minor variant of "D1", and occurs only along the right-hand edge of the box. Diamond types 3 and 4 are roughly equivalent, and differ in having either a flower motif in the center, or a hackenkreuz (swastika).

The bottom and sides are covered in a continuous repeating pattern worked in long-armed cross stitch. The only variation within the pattern is whether the blue spirals within each 8-pointed star rotate clockwise or counterclockwise.

To calculate the weave of the ground fabric, I charted the entire pattern, then added up the number of stitches from left to right, and from top to bottom, then divided by the actual dimensions of the box. The bottom and sides turned out to be embroidered on cloth that is 27 tpi (threads per inch) from left to right, and 25 tpi from top to bottom. I calculated the lid to be 44 tpi across, and 26 tpi down. Thinking that this had to be wrong, I double-checked the stitching in some worn areas, and confirmed that the brick stitches do indeed cover only two threads each. The warp threads are extremely fine, and the weft is fairly thick.

The construction of the box itself is quite fine. The wooden pieces (species unknown) are a little less than 1/2" thick. Each piece was covered with pale peach-colored linen, very fine and thin, before being joined together. The cloth disappears into the joints, which are mitered, and joined in an unknown method. The finished embroidered pieces were stitched onto the linen liner of the assembled box with visible overhand stitch. There is a metal foot in three of the four corners of the box bottom, and a hole in the fourth corner. Interestingly, there is also a hole in the middle; perhaps there were actually five feet? Each foot is a metal ball, about 1 in in diameter, stippled all over with concentric rows of little bumps, and the bottom of each ball is slightly flattened.

One odd thing is that the box is "upside down," that is, when opened, the "box" is lifted away, leaving a "platform." There are no handles for lifting the box open. Presumeably one would have used both hands, or one person would have opened it and held it for another.

The box is covered by six separate pieces of embroidery. When closed, the top of the box is covered with a single square of embroidery, covered with diamond motifs. The four sides are covered with 4 long strips of the "spiral" motif. The bottom is covered with a single large square of the "spiral" motif, with the corners nicked out so that the embroidery can be brought up and around to cover the 4 edges of the "platform." In other words, the bottom square of embroidery is larger than the top square by about 1/2" all around (equal to the thickness of the wooden pieces making up the box itself).


Embroidery on the bottom and sides is also charted.

View or download all charts.

Pattens

I really do like Myra's site and thus far I'm finding a good bit of what I need from her site, so to continue this forage of her already wonderful collection of information, I'm posting her link to her pattens, which hopefully I'll be able to replicate in the not too distant future (Read: Within next year or so *sigh*)

http://myra.hem.nu/costume/CostumeGallery/Accessories/pattens.htm

As well as some of the links she used to get her information.

http://www.personal.utulsa.edu/~marc-carlson/shoe/APP4.HTM http://freenet-homepage.de/mittelalterschuhe/neue_seite_55.htm (In German)

The following is a link to many many more links, but knowing me I'll lose it if I don't post the main site here for future reference.

http://www.larsdatter.com/pattens.htm

Landsknecht Beginnings

While searching for other things, I came across a site that will give me a basis for making landsknecht hosery, possibly shirts and (no clue yet if they even wore them) doublets.

Patterns for 16th century Men's Costume from Germany by Michael de Lacy

Women's Hose

Rather than do all the research again, (at least for now) I'm going to go with Myra's rendition of women's hose. The pattern appears simple enough and I think I can likely make a pair without *hopefully* too much trouble. Here's the link to her page:

http://myra.hem.nu/costume/CostumeGallery/Accessories/Hose.htm

Here's another site with construction:

http://cadieux.mediumaevum.com/myhose.html

Landsknecht - Bag

I'm also working on Landsknecht for my husband, therefore, I'm going to start a project list for him as well (not in this post tho, in another). For the nonce, I'm going to show the bag or purse that my husband prefers and we'll figure out how to make it later.


Purse Frame

In many of the paintings I've viewed thus far, quite a few have had openings that were rigid circular frames. They didn't make a heck of a lot of sense to me, until I found the following link:

I've also included the photo from the above site for easy reference:


According to the above link, fine velvet and fabrics were used to construct the actual pouch of the purse. Now, granted, the above picture is from a London find, but there are many German paintings having the same type of construction. Like in the following:

Triptych by Hans Memling (c1470) - Framed Purse Detail of kneeling man in center foreground

At any rate, I think I like how this one looks and if I can figure out how to make it or find someone who already makes them, I'd be rather happy. I've included another picture of the purse itself in use:
William Browne, 1489 engr. c. 1465, Stamford. Lincolnshire

I know thus far that for a female prior to the German Renaissance, it was more commonly worn between the undergown and the overgown, so it wouldn't have been readily seen by passerby.


Monday, September 17, 2007

Bag Research

I found an interesting link today that I have yet to go through thoroughly, but hopefully it'll provide some good information for future research.

Medieval and Renaissance Pouches and Purses

Pleat Put-Off

I've put off working on the steuchlein, but I think what I'm going to do is get a metal yard stick and try doing the pleats that way. Not sure how that will work really, but hopefully it'll help. I figure if I take a piece of cardboard, cover it in material and use it to pin my steuchlein down as I figure out the pleats, hopefully it will make even straight lines. Judicious use of an iron would likely help as well. Nothing like learning and going completely from scratch, right? :D I've seen a contraption that ppl use to make pleats, but whether that would have been used is beyond my research right now. Since I don't exactly have one, that's a rather moot point as it is. At any rate, I'll get the yardstick and see what that does for me.

Wednesday, September 12, 2007

Pleats Again

Though the theory was interesting, I don't think the way I am doing the pleats is going to work. I hate pleats. They are more difficult than you'd think they should be, yet I guess I shouldn't be surprised, just annoyed. I'm going to pull out what I've done thus far and figure out how in the world to do straight pleats.

Wednesday, September 5, 2007

Pleats

Personally, pleats aren't the easiest things in the world to do. I attempted to sew a very light 3/8" 'line' where the inside of the next pleat would be, but then I considered what my next step had to be and realized if I had to do that for all of them, it would take a lot longer than it likely needed to. Called Wynn and though she doesn't do much pleating, she had a suggestion that she said someone else had done. Whether what she told me and what I'm doing tho, are two different things. :D I wasn't quite sure what she intended, but what I am doing now is taking the point of the next pleat and using a -_- type of stitch (yes, that's not very helpful, but think of it as sewing up at the 1/4" line or where I want the first pleat to end and sewing down 1/4" higher on the fabric or into the point of the second pleat, then going about 1/4" and coming up into the point of the second pleat again and finding the corresponding spot on the first pleat). Hmm, a picture will be necessary to make this make sense.
Hopefully that makes sense to someone else, but it appears to be working quite nicely. At any rate, once you've sewn a few of those back and forth stitches, then you pull on the thread and wah-la, you have a pleat without a stitch on the top. Iron it flat and it should be good, though I am only on the first pleat, so we'll have to see if this technique will work on the other pleats and whether or not it'll be hardy enough to work. I may still need to do the top stitch as all the various manuals say it should be done, but I'm hoping not. I'm lazy, what can I say. ;)
This is what the pleat is looking like thus far (rather close up, sorry). It's looking a bit rough right now, but I figure after ironing I'll make a final determination on whether or not the top stitch will need to be done to make it "straighter". Looks better from a small distance!


Caved

Okay, I went ahead and ironed the cream cotton, because putting pleats into an unironed piece of material is a challenge to say the least. Next time I'll do it before I start sewing (yeah, yeah, I know, I know). Also, the hems that I thought were straight, aren't 'quite' and likely should have been done last, but how do you keep the sides from unraveling while doing everything else? Guess I should figure that out too.

Beginning with Research

For the wulsthaube, I believe I will use The Curious Frau's approach and work out the kinks from there. She's produced a nice How To on her site, which I've provided here for easy reference <http://www.curiousfrau.com/Diaries/Steuchlein_Wulsthaube_first.htm>. What's interesting is that 'wulsthaube' would technically translate as bulge hat, therefore, her approach appears sound and usable considering it's in the shape and used similar to a hat. At any rate, I'm still working on the steuchlein, which is likely backward. I should likely have started with the wulsthaube and worked outward, but this is a learning process.

Findings Thus Far

A single thread is definitely more "invisible". I had a few of my weak double threads break (the threads pulled from the original woven fabric) and found that continuing with the single thread at that point was easier even if not uniform with the rest of the piece, but this is a practice piece, right? I've also discovered that the weaker double threads, as long as they remain untwisted, which tends to happen as you sew, doesn't break as often. I didn't pin my original hem at all. I found it was easier, since I pulled the material apart instead of cut it, to work with the straight line that was already provided.

Here are pictures of how things are looking thus far.


This is the running-stitched hem prior to the rolled hem. The right-hand side is the selveged edge. I'm afraid I didn't iron my material before sewing, which is likely one of the main "no-nos" of sewing, but it hasn't really affected what I've done thus far.

This is the rolled-hem completed. I haven't removed the runningstitch thread yet, tho I'm debating right now if I need to. It will likely make it look neater though if I do, but I don't know how easy it will be to remove.

Thinking about my next step, [that is, the pleats that go over the forehead] I realize that it might have been easier to have planned for them and not completed the rolled hems at the ends of the pleats yet to be completed, but hey, we'll see what happens. I'm also going to use the suggestion on <http://cadieux.mediumaevum.com/schilling-headdress.html> and put a piece of canvas under the pleats, but I'm going to experiment with a single canvas layer, not a double as she used. So basically I'm going to have to sandwich the canvas inside the selvege edge of the steuchlein and the pleats. Not quite sure the exact shape or size of the canvas itself, but I have enough to play a little with pins.

Tuesday, September 4, 2007

Thimble

Okay, added another addition to my projects list. I need to either invest in a period thimble or learn how to make a period thimble. It's not that my fingers are pricked beyond repair, by any means, but I have poked my third and fourth finger a few times. Enough to make me realize the need for a thimble. Therefore,


14) Thimble, from what I gather thus far, they were hammered or possibly cast metals. I'm finding hammered to be more common. They'd tend to take a circle of brass and hammer it into the desired shape adding the indentations by hand later.

According to <http://www.ukdfd.co.uk/pages/thimble.html>,

"By the early fifteenth century, thimbles began to acquire a taller and more familiar form, although their crowns usually retained the domed or hemispherical shape of earlier types, and they remained rimless. Their indentations were manually produced and may follow a spiral, vertical linear or parallel ring pattern up the thimble. The size of the indentations varies considerably, the larger ones designed for use with coarser needles and thicker fabric or leather.

The use of precious metals for thimble manufacture during the medieval period appears to be extremely rare and copper-based alloys, predominantly brass, were invariably employed. Although there was no large-scale brass-working industry in England, many thimbles were produced locally. Some, however, were imported from the continent, principally from Nuremberg, which was a major brass-working centre."


Nuremberg thimbles were quite famous for a number of years.

K.C. has indicated what it's going to take to make a brass thimble. Not many tools, but it's tedious work. Okay, so I have a winter project. Not sure how long it'll take for me to learn the process or to actually make one effectively, but hey, it's all about the process, right?

Some examples...

Image of a 14th century thimble

Image of a 14th century hammered copper thimble found in Cornwall.

Image of a 15th century thimble

Mitered Corners

Though I know I've had people tell me about how to do corners, they don't mentally make a heck of a lot of sense, so I found directions as follows:


To sew a mitered corner with all edges enclosed, press under 1/4 inch all around the cut square. Then fold in another 1-1/2 inch and press again. With the 1/4 inch fold still intact, open up the 1-1/2 inch fold and make a diagonal fold on the corner, matching up the creases from the first fold. With right sides together, pin this fold together so that you are sewing on the diagonal with small stitches. Cut out the excess in the miter. Turn corners right side out. Topstitch close to the pressed edge.


I'm going to attempt this on my cotton steuchlein, but I'm not totally sure I'll know how to do it correctly.

Rolled Hem

My first attempt at a steuchlein is with cotton. I realize it's not the best material to start with since it won't react the exact same as linen, which is what I've determine the material should be, but I didn't want to waste the linen I have by trying it out the first time on something good and messing up.


I cut a square of cream white cotton material dimensions of 30"x 30". Thus far all I've been able to do was start hemming one of the rough edges. For the thread to sew the hems, I've simply been using thread pulled from the original material. I've noticed one problem with this method: the thread is thinner and more brittle when pulled from it's sisters, but it appears to work well if you're willing to put up with it breaking now and then. Regardless, I folded it over about 1/4" and used a running stitch to hold it down, now I'm currently folding that same rough-edged running-stitched side another 1/4" and using a rolled hem stitch to hold it down. Later I'll remove the original running stitch to keep it cleaner though from what I've read, it might not be absolutely necessary. I'm also trimming the excess material or strings on the backstitch set so that it will have less material under the rolled hem. My rolled hem isn't as narrow as it likely should be, but sewing and I are playing a careful game... It fights me and I fight back a little at a time. Eventually I'll overcome it and I'll be able to sew worth something. I hope at least.


According to <http://www.perestroika.ca/html2/vest/handstitching.php>: The rolled hem uses a slipstitch to secure a very narrow finished edge. Roll the fabric between your thumb and finger (or, if the fabric won't roll, fold it), then secure it with a tiny stitch that catches just a thread or two from the fabric and then a short stitch through the roll (or the edge of the fabric).


Note: Though I've seen instructions that say to use a single thread when doing a rolled hem, I've been using a doubled over piece of thread for this experiment. I *think* the only real difference will be the stitches visibility on the cloth, but for now a doubled over piece of thread is easier for me to work with right now.

Projects and Understanding

Because very little of what we do is "standard" (there are many periods of time and many cultures to choose from), it feels difficult to get the information necessary to create the 'kit' you'd likely have worn for your chosen period/culture. What also goes with that "standard" is the difficulty of having the same generation information they would have had during period. In the modern times, we have certain knowledges that we take for granted which we tend to pass down to the next generation just as the previous generations passed information down to us. That's not to say the information is never written down, it's simply to say that having a family member or close friend teach you one thing is a lot different compared to finding the information about a previous generation or two on your own. The learning curve is different. Though I know there are people out there that likely have the information I'm seeking, we're far enough apart in our connections to make it difficult to do things up properly or as they would have been done at one time.

After all of the previous, I have determined that I need to set-up a 'project' list as I figure out all the various things I likely need as well as continue them in a sort of diary mind-set to pass on the information I find as I go. Many others have done this and I know that from reading what they've written, it will not be easy to get the same information passed on to anyone else in a clearer manner myself, but I will make attempts now and then.

Therefore, let's start with what I'm working on now. I'm working on what I've been able to determine is called a 'steuchlein'. It's the veil that goes over the wulsthaube (or wulst). They come in various styles from what I can tell, but my goal is for something like the following:
Aristotle and Phyllis by Master of the Housebook c1485
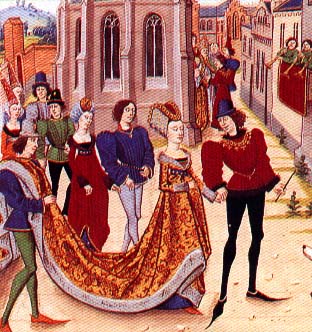
including the pleats on the front and the extra material that another lady indicates is a separate piece of material tucked into the steuchlein creating the long piece of material hanging over her right shoulder. <http://cadieux.mediumaevum.com/schilling-headdress2.html> I don't know if I agree with her initial construction of the steuchlein, but it does look really nice.
What I would ultimately like to do is recreate that outfit in its entirety. Therefore, we have
1) the steuchlein
2) wulsthaube, since she's likely wearing a wulst under the steuchlein
3) a schaub, the overcoat of sorts
4) a kleid (dress/clothing or kirtle which appears to be the term being used) including the pleats that are over the tummy and in the same place on the back. One lady has called them 'pregnancy pleats' which makes a lot of sense
5) a hemd (shirt, chemise, smock, etc)
6) the gurtil (belt) around her waist that holds bags or can simply be decorative
7) There is something around her neck that is indeterminate, but it's been in a few of the images that I have found. It could be attached to the hemd, which seems quite possible, as well as it could be a completely separate piece. I have found one image where that decorative piece around her neck is shown 'outside' the dress, not from under it, which others show. Therefore, that one seems to show that it may not have been a solid piece with the hemd, but I am way too early in research to determine something like that.
8) the fringe, though she doesn't sport the typical fringe worn with this style, I'm going to make one to go with everyday wear anyway. Normally it's worn at the back of the head likely to cover any loose hairs that are at the nape of the neck. If I find out the significance, I'll mention it. This fringe is also worn without the steuchlein and wulsthaube.
9) hose (not shown here)
10) poulaines [not shown here] (or shoes), their rather pointy toed shoes that ride just below the ankle.
11) pattens, wooden platforms for the poulaines, a way to keep them out of mud and provide a level of support
12) unterhosen, yes, I've seen them in period pieces from the 15th century, rare though they might be, so I'm making some, cause it would simply be weird not to. <http://cadieux.mediumaevum.com/schilling-undies.html>
13) a bag of some sort to carry things
14) thimble
15) garters